
For the last 5 or so years my LEGO collection has been packed up awaiting the day when I can finally unleash it upon my very own LEGO room.
When we purchased our house my wife and I negotiated what rooms would be allowed to have LEGO and which would be free from the "clutter of colored plastic blocks that hurt my feet."
I was lucky enough to be granted THREE rooms in the house. The study, the front lounge and the double garage, which funnily enough has never housed a vehicle since the previous owner used it as a full workshop and previous to that was a display home sales room.
We had a long settlement which gave me months to work out what sort of layout would best suit the dimensions of the garage which are:
- 6.4 x 6.2 Meters
- Approx 25 x 24 standard LEGO baseplates (32x32)
- Approx 800 studs across
I decided to go with a centralized table rather than tight against the wall, with a top and a secondary shelf below as well as space underneath for tub or drawer storage.
The table top would display my soon to be LEGO city layout and the bottom shelf will be for displaying primarily Star Wars sets.
I had 3 walls to play with for shelving as the roller door takes up one length. Large shelving units would be placed on one side of the table against the wall. Opposite them would be smaller modular type wall hanging shelves. After some more negotiating with the wife I was allowed... decided that I would wall mount a TV opposite the roller door. That way I could enjoy the room while watching movies and TV shows or streaming My favorite YouTube channels.
The boring part of all this was preparing the room like cleaning the industrial tile flooring and painting the walls all white as they were a mix of brick, plaster and various undercoats due to the place being a workshop beforehand.
Once that boring stuff was done it was time to get some custom tables in there.
To make transporting it home feasible, 5 smaller tables would be made up to create the large overall tabletop. I wanted to be surrounded by the city so I could either go with a squared U or an O shape. I decided to go with the O for that extra bit of real estate which meant committing to being able to kneel and duck under a 6th table top that would bridge two of the full tables.
 |
| Raw materials delivered, cut to size and ready for welding. |
I work for a business that manufactures signage lightbox frames so thankfully I was able to use their skills and expertise to help me get this job done. My main man Kenny is a surgeon with a welding torch so one afternoon after work, with a slab of beer as adequate bribery, we were on our way to an actual table.
 |
| 10 Table frames welded and waiting. 20 x 20 x 2mm galvanized steel square hollow section for the frames. Added cross supports to prevent the wooden table tops from sagging in the middle. |
 |
| 20 Table legs standing at attention. 30 x 30 x 3mm galvanized steel square hollow section used for the legs. Steel plates to attach wheels. They will have to withstand the full might of a LEGO addicts collection. |
 |
| The merging of the frames and legs begins. This table will have some serious clutch power holding it together. |
 |
| I stayed well clear when the sparks were flying, jumping in only to help position things as needed. |
 |
| Using extra cuts of steel to prop the upper and lower frames the correct height apart. |
Once the tables had been welded together it was off to the powdercoaters for a lovely shade of gloss white to be applied. At one stage I had considered making each table a different color but I have another cheeky plan in mind if the white becomes too boring in the future.
The powdercoater does amazing work and has a fast turnaround so less than a week later and they were back in the factory awaiting the installation of lockable swivel wheels.
 |
| Here I have spread the frames out ready to attach the lockable swivel wheels. |
 |
| Lucky the factory had some free space to lay them all out for this beauty shot. Wheels are attached. Only the crossbar up top completing the square O shape is missing from this photo. |
Table frames Done!
The table tops were always going to be the most annoying part of the assembly process. Because even the 5 individual tables were so large no single board was going to fit as I wanted so each top would have to be made up of 2 boards each plus an extra for the duck under section.
Off to Bunnings to source the 12mm MDF boards. I got 21 in total and they had to be cut to size in store as I was told our factory bench saw wasn't accurate enough. MDF sawdust is apparently very bad to inhale so I let the proffessionals handle it. Major thanks to my local Bunnings store because they went above and beyond with their cutting service. Each board required 2 cuts and, even though some were done in multiples, each time the attendant measured twice. Things went from great to amazing when the lady at the service counter didn't even want to charge me for the 42 total cuts. Fantastic thankyou. As they came off the saw I sticker labeled each one a letter so I could identify where it needed to go later.
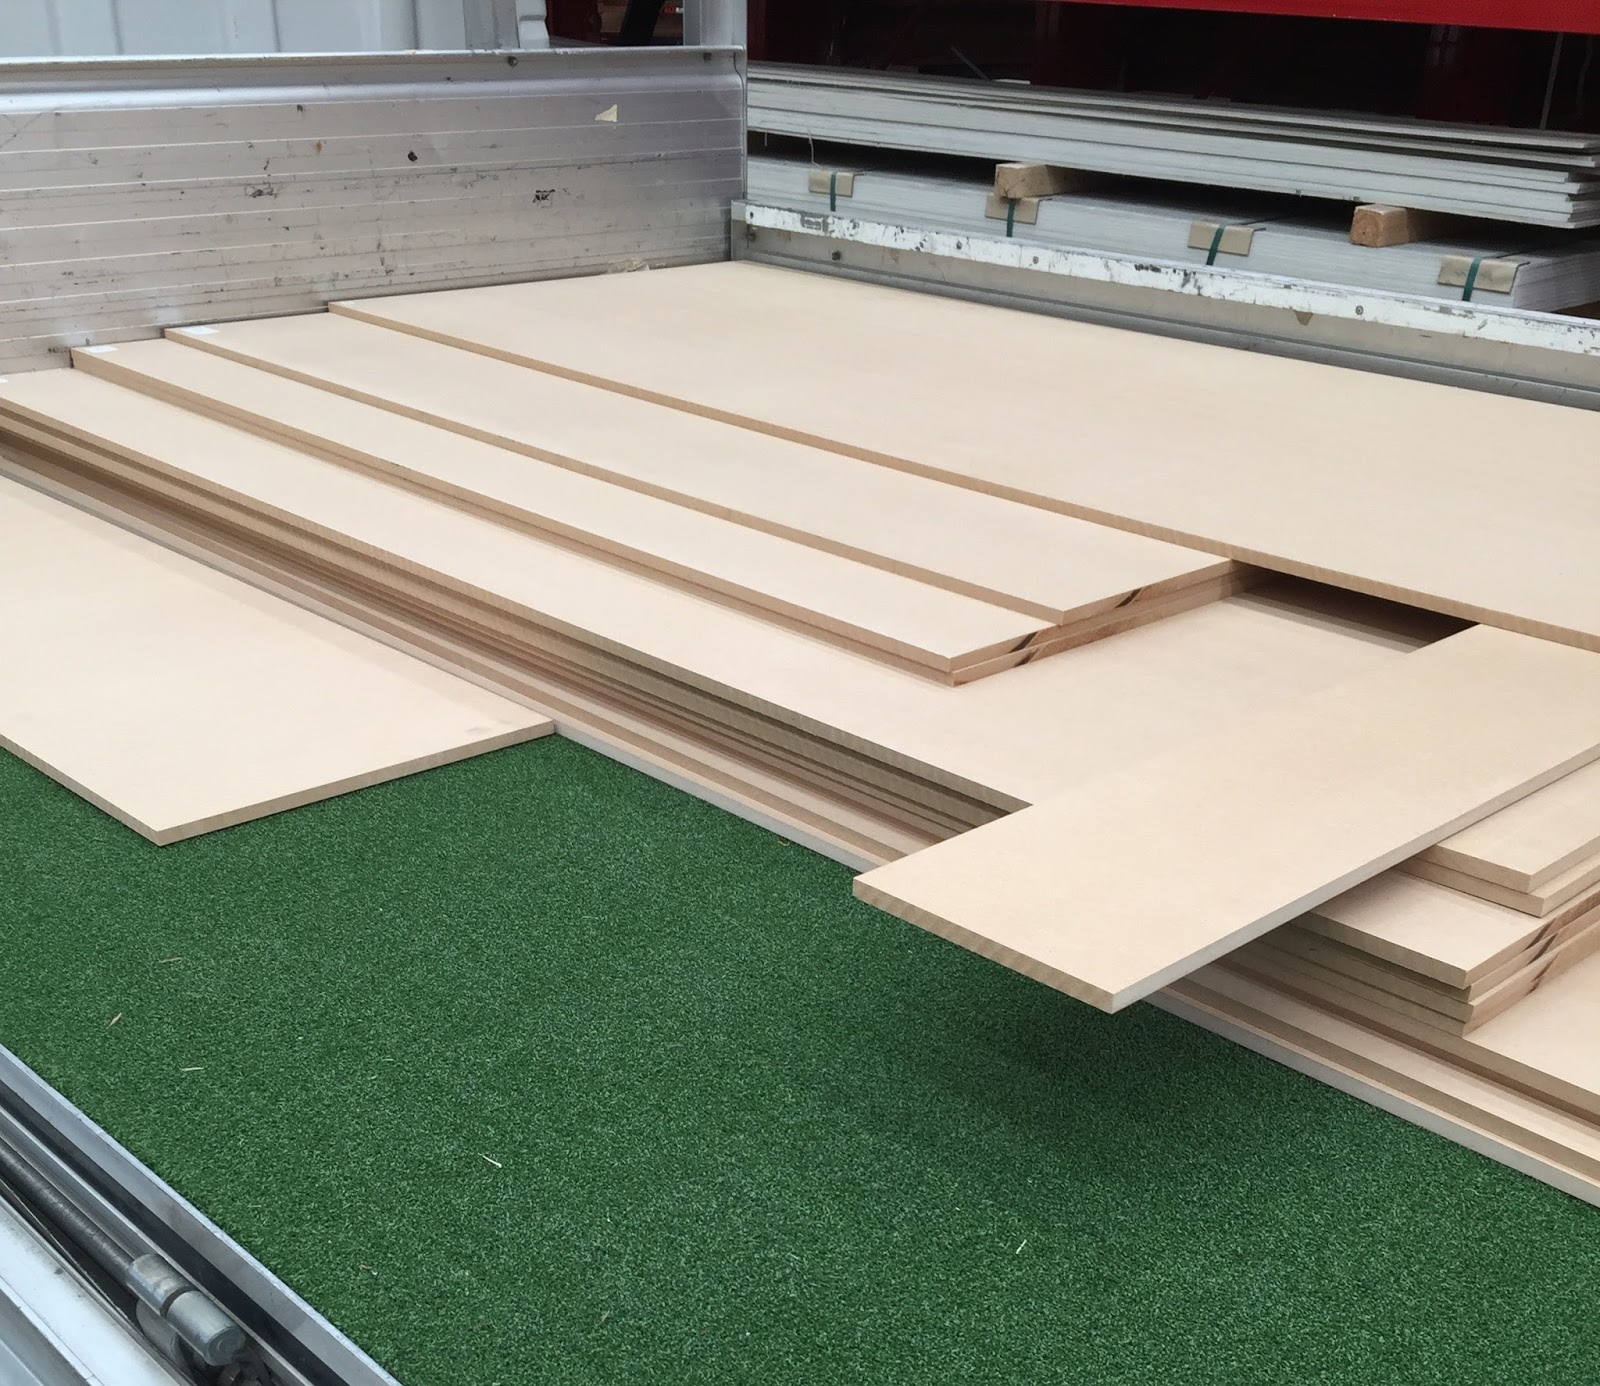 |
| Loading up the work truck with 2440 x 1220 x 12mm MDF board cut to size for the table tops and bottom shelves. I took the cutoffs as well as I figured I could use them to make more smaller shelves later if I wanted. |
All hands on board for this part. Kenny, Buzz and John all got around the tables and helped me line everything up and screw it all together. Bottom shelves went in first and each one of those needed the corners cut out to allow the table leg to slot in. In the end we used over 200 high strength screws to attach the MDF to the steel frame, each required a hole to be drilled in the steel first. Tedious work, but many hands make the work go faster... or something like that. Champion blokes!
 |
| The clamps help hold the wood to the frame while we drill and tapped the screws. |
 |
| Working our way around the table. Having the locking wheels made it much easier to adjust the table tops as needed. |
 |
| After the last screw was drilled we measured the diagonals across and we were within 3mm margin of error. Fantastic! |
 |
| The lower shelves. Few too many shadows, I think it might need some extra lighting under there. |
Very happy with the completed table. Even as a complete set it rolls so smoothly on those wheels.
So this has been a bit of a boring one but here are some less boring stats about the table which will lead to the potential for displaying a big LEGO City:
- 4.4 x 5.1 Meters
- 17 x 20 standard LEGO baseplates (32x32)
- 544 x 640 studs
- 316 standard LEGO baseplates (32x32) can fit on this space, which includes subtracting the middle standing zone.
- 323584 studs surface area across the table to work with!
With the tables construction complete it is time to get them home and into the LEGO room...
Stay tuned for Part 2.
No comments:
Post a Comment